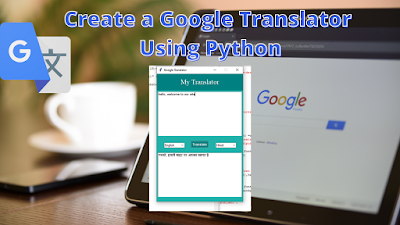
Google translator using
Python
In this article I am going to show you how you can
create a Clone of Google Translator with the help of python programming
language.
|
Table of content ·
Required
Modules ¨ Tkinter |
Required Modules for our
Translator :
1.Tkinter:-
The tkinter package
(“Tk interface”) is the standard Python interface to the Tk GUI toolkit. Both
Tk and tkinter are
available on most Unix platforms, as well as on Windows systems. (Tk itself is
not part of Python; it is maintained at ActiveState.)
Running python -m tkinter from the command line should open a window demonstrating a simple
Tk interface, letting you know that tkinter is
properly installed on your system, and also showing what version of Tcl/Tk is
installed, so you can read the Tcl/Tk documentation specific to that version.In
addition to the Tk interface module, tkinter includes
a number of Python modules, tkinter.constants being one of the most important. Importing tkinter will
automatically import tkinter.constants, so, usually, to use Tkinter all you need is a simple import statement:
import tkinter
Or, more often:
from tkinter import *
2.Googletrans:-
Googletrans is
a free and unlimited python library that
implemented Google Translate API. This uses the Google Translate Ajax API to make
calls to such methods as detect and translate.
Compatible with Python 3.6+.
Features
·
Fast and reliable - it uses the same servers that
translate.google.com uses
·
Auto language detection
·
Bulk translations
·
Customizable service URL
·
HTTP/2 support
HTTP/2
support
This library uses httpx for HTTP requests so HTTP/2
is supported by default.
How does
this library work
You may wonder why this library works properly,
whereas other approaches such like goslate won’t work since Google has updated
its translation service recently with a ticket mechanism to prevent a lot of
crawler programs.
I eventually figure out a way to generate a ticket
by reverse engineering on the obfuscated and minified code used by Google to
generate such token, and implemented on the top of Python. However,
this could be blocked at any time.
Installation
To install, either use things like pip with the
package “googletrans” or download the package and put the “googletrans”
directory into your python path.
$ pip install
googletrans
Reference: https://pypi.org/project/googletrans/
Here , I created two python program, one for designing
and second for working of our translator:-
1.app.py
2.mainMethods.py
Designing of
translator using Tkinter module:
*Importing all required
modules
from
tkinter import *
from
tkinter import ttk
#This
module provides classes to allow using Tk themed widget set.
from
mainMethods import MyTranslator
*Creating object of Tk() and
set its geometry, title ,background color etc.
app =
Tk()
app.geometry("350x520")
app.title("Google
Translator")
app.resizable(0,0)
app.config(bg='LIGHTSEAGREEN')
*You can
also set the icon of the frame using wm_iconbitmap .
#app.wm_iconbitmap('icon.ico')
*Creating the function
named get1() for getting input and presented the desire output.
def
get1():
s= srcLangs.get() #get choosen language of
input
d = desLangs.get() #get choosen language of
output
Sentence= sourceText.get(1.0,END) #get the text of first text area.
*Creating object of Mytranslator class that
is created in the mainMethods.py.
translator = MyTranslator()
#calling the run method text = translator.run ( txt = Sentence, src
= s, dest = d)
destText.delete(1.0,END) #clear the
textarea
destText.insert(END,text) #showing output
*Designing the Translator,
you can change the color and height width according to your requirements.
appName =
Label ( app, text="My Translator", font=('times new roman',20),
bg ='TEAL', fg ='white', height=2)
appName.pack(side=TOP,fill=BOTH,pady=0)
*creating
frame
Frame = Frame
( app ).pack ( side = BOTTOM )
*Creating the first textarea for taking input from user :Text is
a class.
sourceText
= Text ( frame, font = ( 'arial', 10 ), height = 11, wrap = WORD )
sourceText.pack
(side = TOP, padx = 5 , pady = 5 )
*Creating the button for
translate the input into desirable output and call the function “get1()”.
transBtn
= Button ( frame, text = "Translate", font = ('arial', 10 , 'bold' ),
fg = 'white', bg = 'TEAL', activebackground = 'LIGHTSEAGREEN' , relief=GROOVE,command=get1
)
transBtn.
pack(side=TOP,pady=15)
*set the languages,
MyTranslator is the user define class created in mainMethods.py
langs =
MyTranslator().langs
*Creating dropdown list of
languages for taking input from user.
srcLangs
= ttk.Combobox(frame,values=langs,width=10)
srcLangs.place(x=30,y=280)
srcLangs.set("English")
*Creating dropdown list of
languages for giving output from user.
desLangs
= ttk.Combobox(frame,values=langs,width=10)
desLangs.place(x=240,y=280)
desLangs.set("Hindi")
*Creating the 2nd
textarea for display the translated sentence
:Text is a class.
destText
= Text(frame,font=('arial', 10),height=11,wrap=WORD)
destText.pack(side=TOP,padx=5,pady=5)
Our Designing part is complete now ,so move on the working part of our translator for that you
need to create the mainMethods.py .Lets start coding…..
*Importing the module
googletrans.
from
googletrans import Translator, LANGUAGES
#
print(LANGUAGES)
*Creating the class
MyTranslator
class
MyTranslator:
def __init__(self):
*getting all languages and convert it into
a list
self.langs = list(LANGUAGES.values())
*Creating the function named
as run
*Set the default language of input and output
as English and Hindi.
def run ( self, txt = "Type text
here", src = 'english', dest = 'hindi' ):
#object of Translator()
self.translator = Translator()
self.txt = txt
self.src = src
self.dest = dest
try:
self.translated =
self.translator.translate(self.txt,
src=self.src,dest=self.dest)
except:
self.translated =
self.translator.translate(self.txt)
return self.translated.text
You can get the entire
woking source code here:


0 Comments